Keyframes, references, video edits, and practical shot planning
SEQUENCER
8 min read
Based on the Sequencer model catalog checked November 17, 2026. Covers are editorial illustrations.
Contents
The creative brief
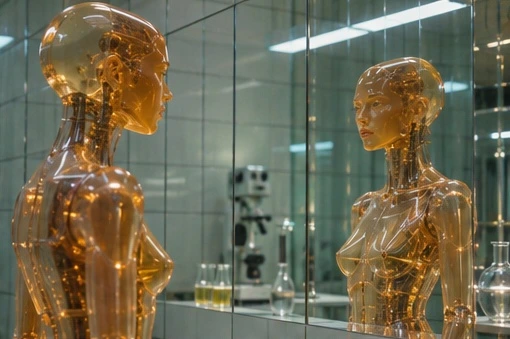
A mirror makes a camera move unforgiving. The reflected figure should appear at the right moment and stay on the correct side of the glass. Kling 4.0 in Sequencer supports keyframes, image references and editing an existing video at 720p or 1080p. Use a starting image to establish where the mirror sits.
Use frames, references, or an existing clip
Kling 4.0 offers three useful ways to approach this reveal. Frame inputs define specific moments. Reference images and videos describe the subject, location, or movement. Video to Edit starts from an existing performance that you want to revise. Choose the approach that supplies the part of the shot you already know.
In Sequencer, start, middle, end, and reference images share a ten-image limit. Video inputs share a five-video limit and a combined 30-second allowance. An edited base clip keeps its duration and aspect ratio. These limits make a small, purposeful reference set easier to manage than a large collection of loosely related examples.
Sequencer settings
Kling 4.0 settings in Sequencer
Setting
Available options
Resolution
720p or 1080p
Duration
3–30 seconds
Inputs
Start, middle, and end frames; image references; video edits
Stage the mirror reveal
Create a starting image that clearly separates the android, the mirror frame, and the reflected space. Make sure the frame can hide the reflected face at the beginning of the shot.
Open the video studio, select Kling 4.0, and attach that starting frame. Begin with a short 720p test. Choose the aspect ratio for the finished placement before comparing camera paths.
Describe one lateral camera move and the moment the reflection becomes visible. An ending frame can establish the final composition; a middle frame can anchor a pose that the reveal needs to pass through.
Review the reveal at the first visible face, then play the complete shot. Once the geometry and timing work, increase the resolution to 1080p or lengthen the hold. Recheck the full result after changing either setting.
Try the prompt
Slide the camera slowly to the right behind the amber android. Its reflection emerges from behind the mirror frame. The android stays still until the reflection is fully visible.
Check the first frame that reveals the face. If a second body appears in front of the glass, simplify the move and rerun it. Reserve a longer take for a reveal that genuinely needs more screen time.
Troubleshoot the reflection
Watch the mirror frame as carefully as the face. Its edges should remain rigid, and the reflected figure should appear inside the glass at a believable position. If the camera move produces an extra body, reduce the sideways travel and give the shot a clearer starting composition. A smaller reveal is easier to assess than several simultaneous changes in angle and pose.
Use an existing clip when its camera path and performance are already approved. In Video to Edit, describe the targeted revision and name the elements to preserve, such as the android’s pose, the mirror’s placement, and the room lighting. Compare the whole timeline with the source, including the frames before and after the reveal.
Build a clear input plan
Start from the part of the shot that is already decided. If you know the opening composition, supply a Start Frame. If you know a critical intermediate pose, use an ordered Middle Frame. If you have an approved performance that needs a visual change, begin with Video to Edit. Each approach puts a different kind of evidence in front of the model.
All image inputs share the ten-image allowance. A starting frame, two middle frames, an ending frame, and three appearance references already use seven of those slots. Plan the set before uploading so you can identify what each image contributes. A middle frame should describe a moment the shot passes through; an appearance reference should explain the subject without accidentally suggesting a different camera setup.
For video guidance, keep the combined source material within the supported five-video and thirty-second limits. Use short, relevant examples with a clear motion or camera instruction. Tell the model what to borrow from each example. A dance clip used for movement and an advertisement used for lighting should have distinct roles in the written brief.
Plan a reveal with three useful frames
For the mirror shot, sketch the opening, the reveal, and the final hold before generating. The opening establishes which side of the android the camera occupies and how the mirror frame hides the reflection. The middle shows the first readable reflected face. The ending holds the completed composition long enough to make the reveal clear.
Keep the room, android, mirror dimensions, and light consistent across those images. A keyframe set with changing geometry asks the model to invent a transformation as well as a camera move. Check that the intended sideways motion could plausibly connect the frames. If the ending view requires a much larger move than the duration allows, reduce the distance or give the scene more time.
Describe the connecting action once the frames agree. For example: move slowly right, let the reflected face clear the mirror edge, then settle into the final composition. This provides a trajectory and a stopping point. Review the motion between the supplied images, since convincing keyframes can still be connected by a weak transition.
Revise an approved clip with Video to Edit
Use a supported 3–30-second MP4 or MOV as the base clip. The edited output follows that video’s duration and aspect ratio. Trim the source to the section you intend to revise before submitting it, then describe the desired change in terms that can be checked across the whole take. A jacket color, a background surface, or a prop treatment makes a more focused first test than replacing the complete scene.
Name the source features that define the approved shot: performance, camera path, contact with props, and timing. Keep a copy of the original on the editing timeline so you can compare matching moments. Review the beginning and ending as well as the most visible edit. A change can look correct in the middle and weaken during an occlusion or a turn.
For the android, a useful test would change the body finish from amber resin to brushed silver while preserving the pose, mirror position, and camera move. Inspect whether the reflection carries the same material change at the same moment. Approve that isolated revision before asking for another environmental or lighting adjustment.
Three more shots to try
•
Architecture reveal: Begin behind a stone column in a quiet atrium. Move slowly left until a circular staircase is fully visible. Keep the column rigid, the vertical lines straight, and the morning light consistent. End with a short hold on the staircase. Review parallax and the stability of railings throughout the move.
•
Performance with an intermediate beat: A ceramic artist raises a small bowl, turns it toward the window, and examines the rim. Use matching frames to establish the opening, inspection pose, and final hold. Keep the hands and bowl visible. Review the grip, bowl shape, and whether the turn has a readable purpose.
•
Product material edit: Supply an approved rotating product clip through Video to Edit. Change the outer shell from glossy black to matte white while preserving the seams, buttons, rotation speed, and camera. Compare the object at several matching angles and inspect the material around edges and occlusions.
Price the whole take and inspect the final
The catalog checked November 17 lists base rates of $0.18055 per second at 720p and $0.27025 at 1080p. Ten seconds at those rates works out to about $1.81 and $2.70 respectively. Use the current quote for your complete input set and workflow. A longer take increases both the amount of screen time and the amount of footage that needs to pass review.
Budget drafts, revisions, and the final output as separate attempts. Check the finished clip for rigid surfaces, reflection continuity, subject identity, and useful handles at the beginning and end. Put it into the actual sequence before approval. A reveal that works alone may need a longer pause or a tighter ending when it follows the preceding shot.
Common questions
How many keyframes can I use?
All image inputs share a ten-image limit in Sequencer. Start, middle, end, and reference images count toward that total. Add a frame when it resolves a specific staging or timing problem, and keep the intended progression easy to read.
Can I upload a finished video for an edit?
Yes. Use Video to Edit for a 3–30-second MP4 or MOV. The output follows the base video’s duration and aspect ratio. Describe the requested change and review whether the original performance, composition, and surrounding details remain consistent.
Why begin at 720p?
A short 720p run helps you judge the camera path and reflection before committing to the final settings. The final 1080p generation still needs review, because an approved draft establishes direction while the finished output establishes the actual deliverable.